My Google Summer of Code Project – Indoor Geocaching Application for Android

Yippey! I am selected for Google Summer of Code 2011.   Many people asked me what my gsoc project was about and after iterating the explanation a few times, I thought the better idea to brag about it was to blog about it. 🙂

How I came across this Project?

I was browsing through various organization projects tagged Android in the list of accepted organizations for gsoc and came across Komodo open lab. Their project ideas page listed some interesting project ideas and the Indoor Geocaching game based on tagin! specifically caught my attention, mainly because it was similar in some aspects to Cygnus. After some chats with mentor on the irc channel about the project idea and implementation,  I was completely hooked into the idea.

What is the project about?

Okay, time to get into the business of explaining what this project is really about. Geocaching is a popular adventure game played all around the globe by people of all ages. Basically, it is a high-tech treasure hunting game played throughout the world by adventure seekers equipped with GPS devices. Statistics say that there are over 5 million geo-cachers on the face of the planet.

Now the idea of Indoor Geocaching as the name suggests is to take geocaching indoors. The technique used in outdoor geocaching cannot be extended for behind the doors geocaching as GPS tracking need a clear line of sight to the GPS satellites, so their performance is reduced in shaded environments.In fact, most GPS devices don’t work indoors. So we need a completely new approach to tackle this problem.

That’s where tagin! kicks in. It is an open source, location tagging engine that may be used to create indoor location-based services (LBS) and applications. tagin! works by collecting various WiFi fingerprints of a particular location. A WiFi fingerprint is the pattern of signal strengths of a collection of WiFi access points visible in a particular area. This signal strength pattern tends to vary from place to place, that is how tagin! can identify different locations (e.g., rooms) even when they are covered by the same group of WiFi access points.

I have explained the basic functionality of the application in as many as 2 steps.  If you are interested in knowing more about the application or features planning to be implemented, you can read from my wiki page.

  • User login/sign up into the Indoor Geocaching application.
  • He can choose to either find or hide a cache. In case he chooses to hide a cache,  he can do so by going to the location of cache, storing the fingerprints and submitting them to the server. To find a cache, the user downloads the fingerprints associated to the cache and use the navigational interface displayed by the app to get himself there.

The application involves a server side as well as a client side and I have been selected to work on the client side application in Android for the project.  I am looking forward to an exciting summer of coding. 🙂

cheers,

Primal Pappachan

Leave a comment

Filed under Android

CyGNUS – Microblogging platform for Android

Cygnus is a microblogging application for Android phones. Microblogging is a networkingservice that allows the subscriber to broadcast short messages to other subscribers of theservice. It allows mobile users of cell phones to stay abreast of activities within a group by receiving frequent published updates, of 140 characters or less. Just like any other Internet tool, microblogging can be utilized for various purposes in fields such as business, education etc.

The front end of Cygnus was developed using Android SDK and back end using Django which is a Web development framework over Python. The communication between frontend and back end was established through HTTP requests.

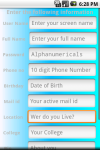
Here are few screen shots of CyGNUS

Developers:
Aneesa N

3 Comments

Filed under Android

Parsing JSON using GSON in Android

As part of the college mini project,  I along with my group, developed a micro-blogging platform for Android. One of the biggest hurdles I had to face was of choosing the proper data format for receiving responses from the web service. I needed something that was fast as well as easy to understand and parse.  I first chose XML as it was easy to read and mostly because I knew no other alternatives. But parsing XML certainly wasn’t easy. With the variety of tags in the responses from the server and the heaviness of XML format, it just became impossible to use it.

That’s when JSON(JavaScript Object Notation) came up as an alternative to XML. I was circumspect about using JSON at first as I had doubts about its readability and ease of deserialization. But those doubts were not much more than just superstitions. JSON is smaller and easier to parse, than it’s XML equivalent. Many say its less readable than XML, but considering it was used for data interchange, readability was not important.

The easiest way to parse JSON and convert to POJO (Plain Old Java Objects) in Android is to use the Google’s GSON library.

Download GSON

Download the latest GSON library from

Google GSON

Add this library into your Android Project as an external by right clicking on the desired project and

Properties -> Java Build Path -> Libraries -> Add External JARs and point to the downloaded gson library.

Format of JSON response.

Suppose, the JSON response recieved from the webservice is of the following format.

{ "posts":
  [      
     { "post": 
        {
       "username": "John",  
       "message": "I'm back",
       "time": "2010-5-6 7:00:34"
            }},
        {    "post":
            {
                "username": "Smith",
                "message": "I've been waiting",
                "time": "2010-4-6 10:30:26"
            }}]}


It is an array of JSON Objects.  You have to develop a class structure in accordance with the structure of the JSON response received.  For the above example I had the class structure based on the following logic.

The “posts” data structure contain multiple posts, each of which contains an “post” type. In order to match this structure, I need to have 3 classes namely PostList, PostContainer and Posts. The PostList class should have an ArrayList of objects of type PostContainer. PostContainer needs just one field which is an object of type Posts. Posts classes must have  3 fields namely username, message and time.

public class PostList {

private List<PostContainer> posts = new ArrayList<PostContainer>();
public List<PostContainer> getPostContainterList() {
return posts;
}
}

class PostContainer{
Posts post;
public Posts getPost(){
return post;
}
}

public class Posts {
String message;
String time;
String username;
}

Deserialization Part

Now let’s get into the real business of Deserialization. Using GSON this can be done very easily.

First, import the Google gson library into the class in which JSON String is to be deserialized

import com.google.gson.Gson;

I am initializing an ArrayList which contains objects of type Posts

private List<Posts> mObjectList =  new ArrayList<Posts>() ;

This can be latter on used for adding the Posts objects after deserialization is done.

String jsonString = “Insert your JSON Data here”

Instantiate an Object of type PostList

PostList list = null;

list = getPostList(jsonString);

The following function deserializes JSON response to an Object of type PostList and returns it.

protected PostList getPostList (String jsonString){
PostList pl = null;
Gson gson = new GSON;
pl = gson.fromJson(jsonString, PostList.class);
return pl;
}

What the function getPostList does is, it creates an object of type GSON and deserialize the JSON String to POJO using that object(gson).

gson.fromJson(jsonString, PostList.class)

The first parameter to the function is the JSON String and second parameter is the name of the class to which it should be deserialized. Two important things have to be taken care of while using GSON to parse JSON

  • Tags in JSON String and name of fields of the respective classes should match exactly.
  • Object hierarchy should be built correctly.

Failure to comply to the both conditions above would result in some or all of the fields of the classes being left null.

Having parsed the JSON string to POJO, we can get various Posts objects separately and add it to the ArrayList which we created earlier as follows.

List <PostContainer> post_list = list.getPostContainterList();
PostContainer pc;
for (int i = 0; i < post_list.size(); i++) {
pc = post_list.get(i);
mObjectList.add(pc.getPost()); //Adding each post to the list

This ArrayList can be used to populate a custom list view. If you have any doubts regarding this post, feel free to ask through comments. In the next post, I will post an tutorial on how to build a custom listview which looks the twitter timeline efficiently.

4 Comments

Filed under Android

First few steps in Android

Android has been out for a while now. Although I had heard about Android from various corners a long ago, I didn’t take an interest to learn it initially. Two months ago, on accident by purpose, as part of college mini project I decided to develop an application for Android.  Now having jumped into the bandwagon, I feel I should have done the same earlier, but better late than never.

Android is an operating system and software stack for mobile devices and uses a modified version of the Linux Kernel.  Click here to read more. A big plus for Android is,  coding is done in Java which is one of the most popular programming languages out. Having a good knowledge of Java simplified things for me greatly. If you are new to Java this online tutorial can get you started.

Pros of Developing for Android

  • No restrictions on applications that can be published.
  • Get to code in Java which is widely known.
  • Can develop on any platform (Mac/Windows/Linux).
  • Great Android devices coming out this year.
  • Easy to do XML way of laying out views.
  • SDK can be integrated with Eclipse IDE.
  • Huge and vibrant developer community.

When I started learning Android, I thought of doing it from a book rather than learning online. But I quickly gave up the idea, after trying 2 books which were ought to be best out there and they weren’t comprehensive enough on many features of Android.

The Android structure of views, intents and activities seems intimidating at first sight. But once you start developing an application it becomes definitely shreds that appearance.  The best place to get started for developing in Android is unarguably  developer.android.com

The Developer’s Guide there explores the concepts behind Android, the framework for constructing an application, and the tools for developing, testing, and publishing software for the platform.

As the tradition goes, the way to start is by saying ‘Hello World’.

‘Hello Views’ gives an introduction of various views and widgets in Android.

Notepad Tutorial This tutorial on developing an Android application gets your feet wet to the framework.

API Demos illustrate the use of various Android APIs.

Common Tasks and How to Do Them in Android

Google group for Android Developers is the best place to discuss Android Dev.

stackoverflow has over 8000 questions tagged Android and you can get answers for most of the questions pertaining to Android Development here.

Android Snippets is where you can share useful snippets of source code.

You can browse the source code for Android here.

The videos from recently concluded Google I/O is worth checking out too.

There are lots of other resources waiting to be exploited all over the Internet for an Android developer. Just get your keywords right.

If you prefer learning from a book, Beginning Android by Mark Murphy would be my recommendation.

From the next post onwards, I will post some tutorials based on Application Development in Android.

2 Comments

Filed under Android